So, it's true: We are officially unveiling our finished basement for all to see! Josh and I have been working really hard since last summer on this basement so that we could enjoy it more fully. We only spent $20-40 at a time, and were able to finish it in well under a year. We made ourselves sleep-deprived, sick, and really happy doing it. I hope you all can fully appreciate the work we put into this, and hope you enjoy looking at what we did.
To make it easier on the reader, I have provided this amazing floor plan of our basement now, and the picture tour you are about to undertake. I will not be showing the storage, bathroom, and bedroom sine they haven't changed (other than new carpet in the bedroom); and the laundry room is only half-way finished, so I won't be showing that one either.

BEFORE:
At the top of the stairs, going down.

AFTER:
At the top of the stairs, going down.

Changes:
carpeted stairs, painted handrail, doorway taken out, wall to kitchen cut in half, and walls painted.
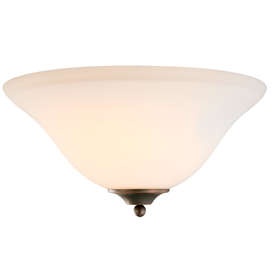
Future changes:
that light fixture *shudders*. I want a built-in china cabinet at the top of the far wall you can see, above the light, with new lighting put inside for display. Also, inset lighting in the ceiling.
BEFORE:
Looking at the stairs from the basement hallway.

AFTER:
Looking at the stairs from the basement hallway.

AFTER:
Basement hallway, once you get to the bottom of the stairs.

Changes:
Finished ceiling (no more heating venting and pipes showing. It was a head-scratcher trying to figure out how to best wall it off, but we did it, and it looks awesome), walls mudded, textured, and painted, new air intake vent, laundry room walled off, and pocket door installed.
Future changes:
Molding, wall decorations, and again, the light fixture. I have this one in mind: (it's a wall sconce, so it sits flat against the wall.)
AFTER:
The pocket door. It slides sideways, keeping the obstruction the door would normally cause to a minimum. It also keep the sounds of the washer and dryer down a ton, and hides my messy laundry room :)


BEFORE:
Smashed-in door leading from the hallway into a weird mini-hallway, which lead to a back room, unfinished.

AFTER:
Door opening to a closet :)


Changes:
changed the way the door swings, walled off the closet, changed the electrical so that the light switch would only turn on a light in the closet (not the other room as well), drywall, and is now a temporary home for our baby chicks.
Future changes:
wrap around shelving and peg board for all of Josh's tools (so they won't be scattered around the house, and taking up space in my storage room!). No, we will not be mudding and painting this room since it will be used for tools - not worth it.
BEFORE:
Completely unfinished room. Concrete walls/floor, insulation hanging from the ceiling, no electrical to speak of on the outer walls, and only two light bulbs to use for lighting, each connected to separate switches 3 feet from each other.

BEFORE:
(looking the other way)

Take special note of that closet in the back of this picture. It was like 5 feet deep because of the water main coming in right there, sticking out almost a foot from the concrete wall... it's all about to change!

AFTER:
Our new Family Room!

Changes:
walls framed, insulated, drywalled, mudded, textured, and painted. Ceilings covered, mudded, textured, and painted. Electrical running along all walls, lighting changed to 5 recessed lights - hooked up to a dimmer switch, the water heater and furnace closeted away with new bifold doors, NEW WINDOW THAT JOSH INSTALLED, carpet, and furnishings.

Oh yeah, and that closet I told you to pay attention to? It's now the new opening for that back room that used to be entered in from the weird mini hallway.

(don't mind the cat cleaning herself in all these pics)

Future changes:
a tree in the right corner here, molding, the other window replaced, and more wall decorations (like a Middle Earth map, artwork on our old fence wood above the couch, etc)

The dimmer switch I amazingly installed :)

My area of the room for my sewing and crafts. I have everything stored in this armoire we got from DI. More future changes include matching curtains for this window as well (the other window's curtains I made along with the pillow on the couch)

The lighting looks really bad in this picture, but I promise it gets really bright.

BEFORE:
Back room that the weird mini-hallway lead to (you can see it to the left of this pic), with crusty shelving on this wall, and nothing anywhere else except more yuck.


AFTER:
Quinn's play room!

Changes:
Shelving taken out, "closets" (one had a 18 inch doorway, and then was 5 feet deep) taken out, weird mini-hallway destroyed and walled off for the new tool closet out in the hall, water main valve replaced (it was huge, ugly, and leaking, and Josh did an amazing job on it) with a new invisible panel, new half door I build myself, walls framed/insulated/drywalled/mudded/textured/painted, ceiling finished, new electrical run around all walls, lighting fixed and updated, carpet, door molding, and things made for Quinn to play with in this room. (Did I get it all?)

Future changes:
Base and crown molding, more artwork to finish off the whole room, finish his table pictures above for his artistic delight (or whatever), white board installed, and more kids to play with.
AFTER:
The reading corner.

AFTER:
The mural complete with a chalkboard.


The white board will be going under and to the right of the window.

The toy storage TOWER that I built for Quinn. I labeled everything for him, too :)

He likes it: :D

The shelves I built for his books.

And the T.A.R.D.I.S. detail on his space wall that was mandatory.

I need to make more car parking, because this isn't even half of his cars...

And there you have it! Hope you enjoyed, will comment, like, etc, because we like the attention and want to know what everyone thinks of it! Thank you! :)
5 comments:
holy cow! You guys did a great job! Especially in your family room!
That is amazing!!!! I am super super impressed!!!! WOW!!! LOVE IT!!!!!
Congratulations! The 2 biggest things on Ryan's dream home wish list is an unfinished basement and a wood burning stove. You guys lucked out! :) It looks fantastic.
Wow!!! I can't believe it! And I saw it throughout many of its stages!! Your vision, creativity, and resourcefulness is unparallelled! Matt was so excited to show me this post, and he showed it off to our hometeachers, too! Whenever we buy, I'm coming to you to help me brainstorm!! =D
It looks so good!! Quinn is so lucky to have such a fun play room!
Post a Comment